Understanding the Android Compilation Process
Objective
The main objective of this blog post is to give you a clear idea about the Android compilation process which describes the stages through which your android application goes through when you build it.
Step 1 What you should know before starting Android Development?
Are you new to Android?
Don’t worry! “I have got your back!!!” ;)
Any Android application has several building blocks. I will give you overview of
The Android’s component Architecture
The Android Runtime Environments - DALVIK AND ART.
Android Compilation Process
Fasten your seat belt! We are about to get started.
1.1 The Android’s Component Architecture
Every Android application is made up of Components. Components are implemented as Java Classes.
For example, an Activity in Android represents a screen or a portion of a screen of the user’s device. It is an instance of a Java class named Android.app.Activity
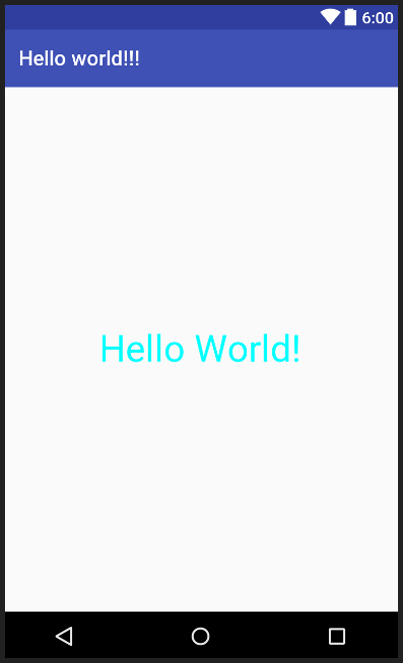
Another example is the UI element Button. A button in an Android application is an instance of a Java class named Android.widget.Button

These are just two examples I have mentioned, but there are thousands of Java classes and interfaces in the Android SDK. I do not want you to worry about ALL THOSE at this moment. ;).
You can also create your own Java classes representing your app’s components.
1.2 The Android Compilers (DALVIK vs ART)
How do your devices (Mobile Phone, Tablet, Android TV and many more) understand the Java code that you have written?
Your source code is compiled by Standard Java Compiler which uses the JIT- ‘Just-In-Time’ compilation model.
Once the code is compiled, it becomes bytecode (with ‘.class’ extension). This code goes for a second round of compilation (Again to Bytecode - But this time it is minimized).
The bytecode gets executed by target-specific-JVM (Java Virtual Machine) which is a runtime environment for Java.
But for Android, we have two different virtual machines:
- DALVIK
- ART
1.2.1 DALVIK
Prior to ART (that was introduced with the release of Android 4.4 - that is, ‘Kitkat’) the runtime environment for Android apps was DALVIK.
So why did Google moved from DALVIK to ART?
There was one major disadvantage of DALVIK - It was SLOW!.
It was FRUSTRATING for users to use their apps on their devices as the apps stuttered while running.
Dalvik uses JIT compilation model. JIT compiler compiles the app when they are opened by users (The app start up procedure). So it made opening of apps slower and which in turn hampered the user experience.
1.2.2 ART
ART uses the ahead-of-time compilation model which compiles the apps to machine code upon installation
Apps run a bit FASTER! under ART, so the startup time of apps gets reduced.
It also has improved garbage collection so that the user sees fewer pauses and stutters in a low memory environment.
ART has its own limitations:
- Installation time issue: The installation process is slow with ART as apps to machine code conversion takes time.
- Size issue: Compiling the code upon installation means that the app has to ‘live’ on your device. So, for a relatively smaller Java code the machine or the bytecode will be comparatively large.
Here is a quora thread discussing ART vs DALVIK

Step 2 The Android Compilation Process
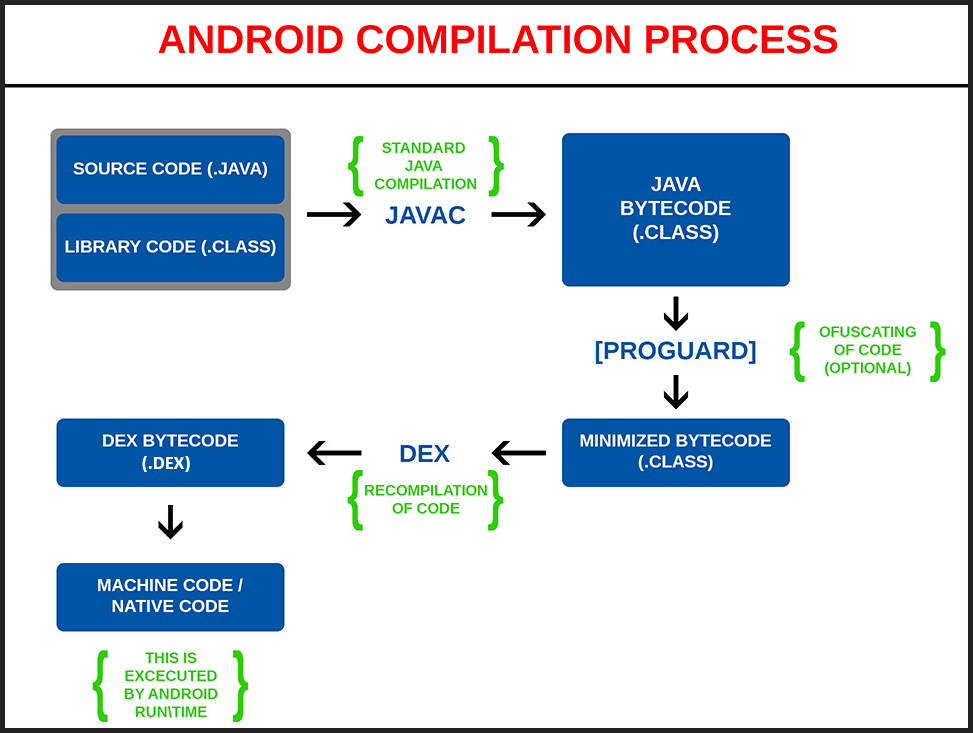
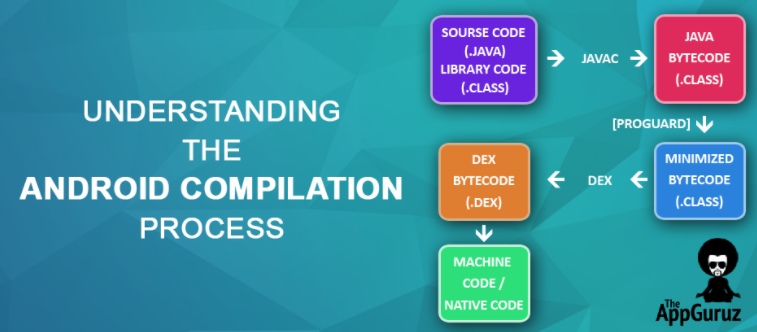
When you compile a Java code into an Android app, it goes through a number of stages
2.1 From source code to bytecode
You will need JDK (Java Developer Kit) to compile the Java code of your application.
Your code and precompiled classes from runtime and custom libraries are compiled first by ‘Javac’ (JIT Compiler/ Standard Java Compiler).
The Javac outputs a set of Java bytecode files. So far this looks like any Java compiler process but the next compilation step makes the compilation process unique to Android.
2.2 The obfuscator! (ProGuard Tool)
This step is optional, you can omit this step if you want to.
The ProGuard Tool takes the Java bytecode files (output as a step number 1) and sends them through a tool named ProGuard. It will minimize and obfuscate (meaning - To make obscure, unclear or unintelligible) your code.
It is disabled by default in new Android projects but when ProGuard is turned on,it will analyze your code and remove implementations of methods, for example, that aren’t called.
This can dramatically shrink your distributable app package. It also obfuscates your code by changing method names and so on making it harder to decompile packaged Java code by a third person or organization.
Regardless of the use of ProGuard you once again end up with .class files (minimized bytecode).
2.3 From minimized bytecode to dex code
The next step is to take the output files from step number 2 and to turn those files into dex bytecode - Dalvik EXecutable(.DEX).
The DEX bytecode is a format that is optimized for Android and which can be executed by the older DALVIK runtime or the newer ART runtime.
2.4 Execution of Machine Code
The device’s runtime read these dex files (output of step number 3) and recompile some of the files to machine code for the fastest possible execution.
On DALVIK this step happens as the app runs using Just-In-Time or JIT architecture.
On the newer ART, the recompilation (or translation to machine code) happens when the app is first installed, meaning that the app can run faster when the user runs it on his/her device.
And that’s how your Java code turns into something that runs on Android. It starts with Java and after a couple of steps, it is transformed into something which the Android runtime can read and execute.


