Setup a Hexo Editor Environment on Mac
Use Upic to Upload to the Image Bed
1 | brew cask install upic |
Setup Image Bed on the Github
Generate the App Secret
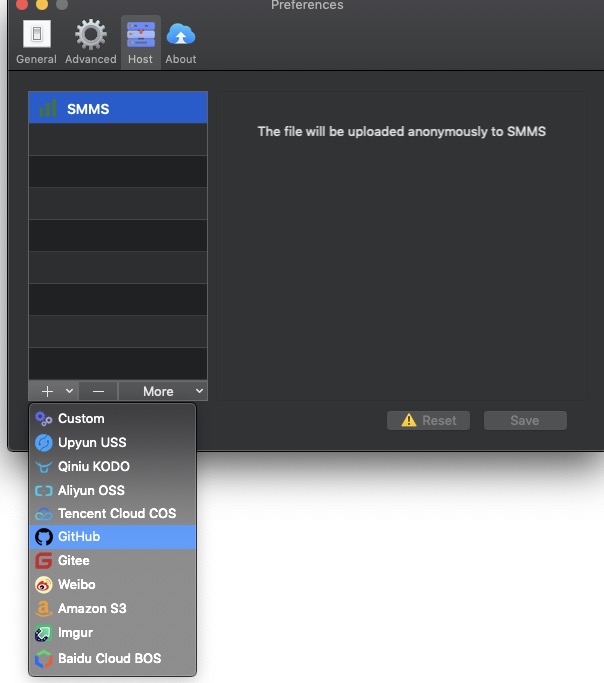
Go to the Github->Setting->Developer Settings->Personal access tokensOpen uPic->Preferences, to add Github as the image bed
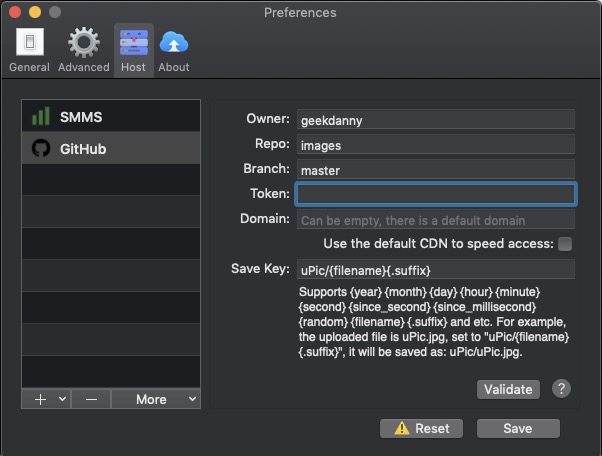
Set the github repo information
Prepare Hexo Env
Install Node
There are many ways to install nodes. Most advanced users want to install multiple versions of nodes instead of one version only. To have multiple versions of node installed, I chose to use nvm.
Install nvm via brew
1 | bew install nvm |
To see what Node versions are available to install run
1 | nvm ls-remote |
Install the LTS
1 | nvm install v12.14.0 |
After installing you can verify what is installed with
1 | nvm ls |
Swith between different node versions
1 | nvm use 11 |
Add SSH keys for the Github repo
Generate SSh keys
1 | ssh-keygen -t rsa -b 4096 -C "your_email@example.com" |
Adding your SSH key to the ssh-agent
1 | ssh-add -K ~/.ssh/id_rsa |
Copy the SSH key to your clipboard
1 | pbcopy < ~/.ssh/id_rsa.pub |
Checkout Hexo Blog Repo
1 | git clone git@github.com:geekdanny/hexo.git |
Install Hexo on Mac
1 | #install hexo |
Add Butterfly Theme Specific Dependencies
My hexo uses the Butterfly Theme, which requires some specific dependencies. The bufferfly repo located at https://github.com/jerryc127/hexo-theme-butterfly
1 | #Go to the blog folder |
Sync YuQue with Hexo
1 | npm i -g yuque-hexo |
Add the YuQue config to the package.json
1 | "yuqueConfig": { |
Staring 2021, Github requested the user to use Personal acces token. The original username and password authentication is not supported.
Step-by-Step Guide to Changing your GitHub Remote Authentication from Password to Personal Access Token
- Go to https://github.com/settings/tokens and Log In
- Click “Generate new token”, and then confirm your password

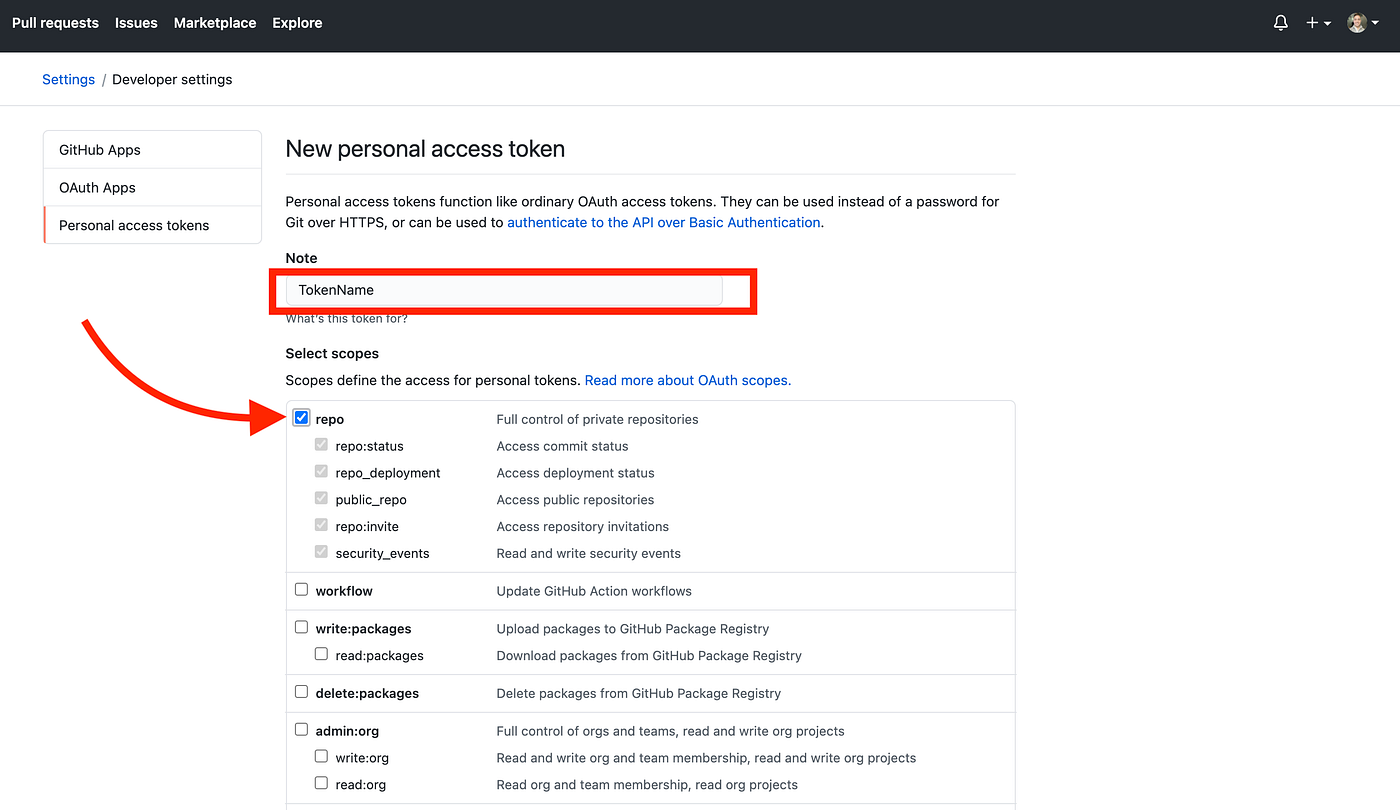
- Add a token name (you can use a naming convention to help keep track of who has which token if you like) and select your desired scopes/permissions. Basic repo read/write access can be achieved by simply checking the repo box (see below).
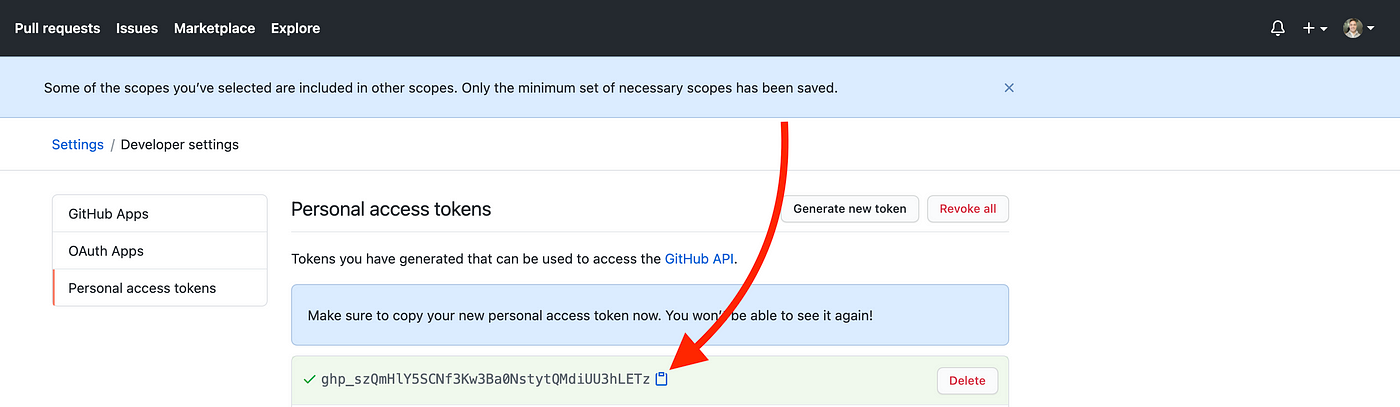
- Scroll down and click “Generate token”.

- Copy the token itself by clicking the blue clipboard. Keep this private! Do not share this token with anyone you don’t want to have access to your repo (I have included the full token in this example for demonstration purposes but I deleted it afterward).
Now change your remote locally. Fire up your local terminal and
cdinto your local repo directory. Note: if you need to remove the old remote do so now; for example, run agit remote remove originto remove theoriginremote.Add your new remote in the following format:
git remote add origin https://<TOKEN>@github.com/<USERNAME>/<REPO>.git
In my case: https://
- Now run
**git remote -v**and you should see something like this:

That’s it! Now try pushing a test commit to ensuring everything is working correctly, and the GitHub warnings should stop.
 wechat
 alipay